15dot4 Documentation
Required Hardware
You will require a supported platform. Currently you have the choice of:
- RavenUSB
- Sam7sUsb Optionally a programming tool would be useful, though not a requirement. See hardware details page.
Programming
A binary file is available which can be programmed into the end device. This file has the format 15dot4-sniffer-Y.Y-XXXX.EXT . EXT is the extension type, .hex for example is Intel Hex, and .bin is binary. Y.Y is the version number, and XXXX is the platform. For the RavenUSB for example, the file might be 15dot4-sniffer-0.1-ravenusb.hex .
Due to the variations in programming for different platforms, documentation is contained in another subpage. See the following:
Setting up USB Stick
Once you have the .hex file programmed in, you will need to set the device up on your system. There are slightly different installations depending on your operating system.
Windows XP
The USB stick has a serial number; this means the same USB stick can be moved between any USB port on the host computer. The operating system will maintain the same driver and instance name even though the USB stick moves around. The serial number is the same as the 64-bit MAC address; if you change this MAC address you will have to reinstall the drivers as detailed in this section.
The USB Stick requires drivers for the RNDIS (network) side. It does not require drivers for the HID (control) side. Thus if the following steps don’t work, consider seeing if the Java control application works.
Windows XP Step 1: Plug in Device
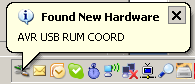
Simply plug the USB stick into a free USB 2.0 port on the computer. Windows should autodetect the device and bring up the ‘New Hardware Found Wizard’:
Windows XP Step 2: Install Drivers
Using the ‘New Hardware Found’ Wizard, select the following options: Screen 1: Do not connect to the internet to search for drivers Screen 2: Install from a list or specific Location Screen 3: Search for the best driver to install Screen 3: Select the location where the .INF file CompositeAtmelRNDIS.inf is located (RavenUSB/SAM3S) or Sam7SAtmelRNDIS.inf (SAM7S). You can download them from the sourceforge project page if you don’t have them. Screen 4: When warned the driver is not signed, click “Install Anyway†Screen 5: Click ‘Finish’
Windows XP Step 3: Set up network connection
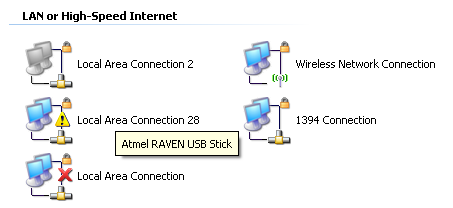
Open ‘Network Connections’, and notice a new network connection is present. Hovering over it you should see the name of the USB stick:
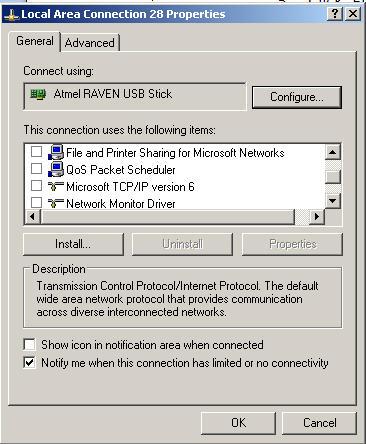
You can rename it to something more memorable by right-clicking and hit ‘Rename’. Then right-click on this connection and select ‘Properties’. Uncheck **every **item on the list:
Linux
Using The USB Stick
Step 1: Install & Run Wireshark
Currently you require the ‘Development Release (1.3.4 or later)’ to get full 802.15.4 support. See http://www.wireshark.org/download.html
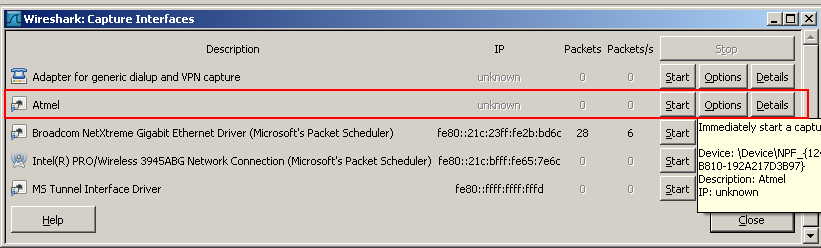
Check the ‘Atmel’ adaptor shows up in the list of capture interfaces. If it doesn’t, but does show up in Windows XP’s “Network Connections”, you may have to restart your computer. If you ever re-install the 15dot4-sniffer driver (ie: go through the ‘New Hardware Found’ wizard, you may have to restart your computer for it to show up again.
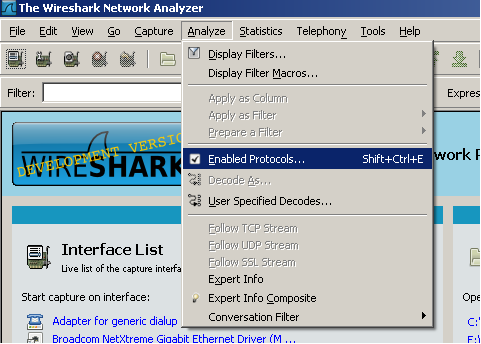
When you run Wireshark, you may choose to enable or disable any protocols you don’t require. For instance the 802.15.4 frames may be decoded as 6LoWPAN or ZigBee, when in fact you are not using those protocols. This option is found under “Analyzer -> Enabled Protocols” in Wireshark. Options of interest are “6LoWPAN” and “ZigBee”.
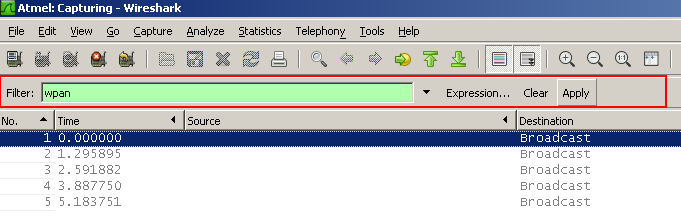
Note that since this USB adaptor is seen as an Ethernet interface on your computer, it may try to send frames to it. You can either disable all protocols on your computer for this interface, or filter in Wireshark. To filter in Wireshark, type ‘wpan’ in the filter box and hit Apply:
Step 2A: Run Java Control Applet (NB: RavenUSB / SAM3S Only)
You can run the Java control application by running the AtUsbHidGui.jar application file, or using the runProject.bat file. You will require the Java Runtime Environment (JRE).
The USB stick can be controlled through the Java Application. This use of this application is documented on it’s own page.
Step 2B: Use Serial Port to Set Channel (NB: SAM7S Only)
Connect the SAM7S to the serial/Programming adapter per the Sam7sProgramming page. You don’t need the JTAG here, just the board which gives you a DB9.
Connect to the computer with a straight-through DB9 female to male cable. Use a terminal emulator at 115200/8N1 settings to connect to the serial port. Press Enter to get a menu, which looks like:
^15dot4-tools sniffer Menu c Set Channel i Information d Dump Radio Registers Selection:^
Set the channel with ‘c’, but note you will need to unplug & replug the USB stick after doing this! The channel is saved in FLASH on the stick, hence is saved across power cycles.
You can see the current channel by pressing ‘i’, one of the parameters is “chan = X”.