Notes on using the SASEBO-W Board
Like my SASEBOGII page, this includes some handy information about advanced features of this board.
NEWAE (COLIN O’FLYNN) ASSUMES NO LIABILITY WHATSOEVER AND DISCLAIMS ANY EXPRESS, IMPLIED OR STATUTORY WARRANTY RELATING TO ITS PRODUCTS INCLUDING, BUT NOT LIMITED TO, THE IMPLIED WARRANTY OF MERCHANTABILITY, FITNESS FOR A PARTICULAR PURPOSE, OR NON-INFRINGEMENT. IN NO EVENT SHALL NEWAE (COLIN O’FLYNN) BE LIABLE FOR ANY DIRECT, INDIRECT, CONSEQUENTIAL, PUNITIVE, SPECIAL OR INCIDENTAL DAMAGES (INCLUDING, WITHOUT LIMITATION, DAMAGES FOR LOSS AND PROFITS, BUSINESS INTERRUPTION, OR LOSS OF INFORMATION) ARISING OUT OF THE USE OR INABILITY TO USE THIS DOCUMENT, EVEN IF NEWAE (COLIN O’FLYNN) HAS BEEN ADVISED OF THE POSSIBILITY OF SUCH DAMAGES.
1. Using the OpenADC with the SASEBO-W
{YOUTUBE(movie=wMYJbEuEvSs&hd=1,width=>500,quality=>high,allowFullScreen=y)}{YOUTUBE}
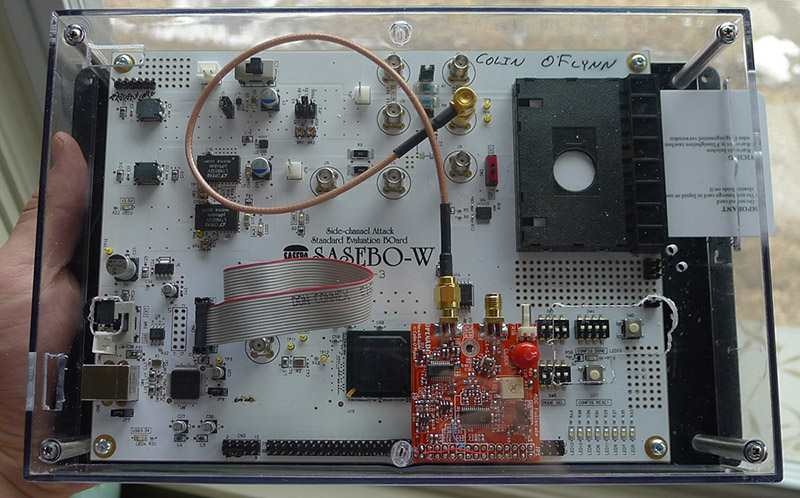
This means you don’t need a scope with the SASEBO-W! Complete Side Channel Analysis on a simple platform. To duplicate this, you’ll need a few things. Click any of the follow photos to make them bigger.
If you wish to purchase the OpenADC, see OpenADC. You can request to have one configured such that it will work directly on the SASEBO-W board at no additional cost.
You can see full details on the Assembla AESExplorer Page
2. Using the USB for Programming
There is absolutely, positively NO WARRANTY, neither express or implied, offered with this documentation and software. You use this documentation and software at your own risk. In case of loss, no person or entity owes you anything whatsoever. You have been warned. See disclaimer at top of page.
The USB device can be used to program the FPGA. I’ll be pushing all my details here shortly, here are some internm notes.
The associated programming tools can be downloaded here: xilinx_urjtag_fpga_programming_scripts.zip
2.1 Programming a SVF File
If you have an SVF file, you don’t need any of the ISE tools. You would only have the SVF file if someone (such as myself or SAKURA) gave it to you as an update. Instructions:
- edit the file ‘program_svf.bat’. There is just one line that looks like this:
call urjtag_svf.bat openadc_sasebow
- Change the name of the second argument to be what the name of your .SVF file is, but without the .svf extension.
- Plug in board, plug in JTAG cable, install drivers if needed etc
- Run program_svf.bat
- It takes a LONG time (10 mins) without any sign of progress sometimes. Just let it keep going. At the end you should see ‘TDO Matches’, if you get any ‘TDO Mismatch’ this is bad.
2.2 Programming the FPGA from .bit File
Programming just the FPGA means that on a power cycle you lose the configuration. It’s much faster for development, so you’ll want to use this normally.
Instructions:
- Install ISE tools. You need at least the ‘LabTools’ (e.g.: impact). Presumably you are doing development with ISE already so don’t need to do anything.
- Connect the little cable between the ‘JTAG’ and ‘JTAGCONFIG’ port
- Plug the board in. If already plugged in you might need to reboot the board (power off/on)
- Look at the ‘program_bit.bat’ file. You will need to change the path to your ISE installation, and also the name of the programming file in BOTH places (defaults to ‘chip_sasebo_w_vcp’). The name of the programming file is without the .bit instruction Other notes:
- If you need to reboot the USB interface, you can’t just plug/unplug it, since that will clear the FPGA. Instead bridge the JP8, and use the FPGA to wire the SW5 input to the USBRST output. Or use a wire to short the pin of JP8 closer to U8 to ground for a second.
- You may need to reboot the USB interface after having used it as a programming interface. I found the FT2232 serial interface did not work as it should after using for JTAG programming until I reset it like above, but just try and see for yourself.
- Use Windows 7 symbolic link ability to automatically ‘copy’ the bitstream file from where ISE spits it out to where the programming script is expecting it.
2.3 Programming attached FLASH
Programming the FLASH means your configuration file is more permanent. Unfortunately the download is slow as the files are huge, so you only want to do this once you have something you want to save. Here is some instructions in video format: http://www.youtube.com/watch?v=Sp02GEPfooY&hd=1
A few notes on that:
- For some reason my command-line script caused impact to crash, so for now just follow the video instructions to make a .SVF file
- Be patient with downloading. On my computer it stalls at 69% for a long time without any sign of it working. Just leave it alone, total time is something like 20 minutes
- Once you have created the .SVF file, follow the instructions for ‘programming a SVF file’
- There is an untested program_mcs.bat which should take a MCS file, create a SVF, then program that SVF in. It doesn’t seem to work yet though.
3. Plastic Case for SASEBO-W
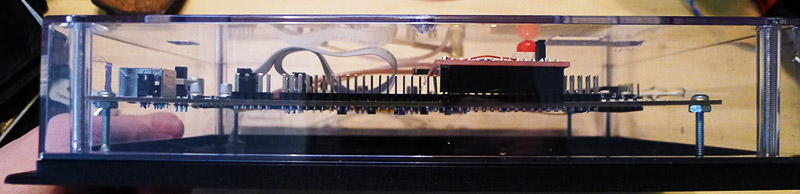
The case http://www.digikey.com/product-detail/en/WM093RC,BK/SRW093-RCB-ND/2286068 works fairly well. One of the stand-offs fits well, I had to epoxy another set onto the board.